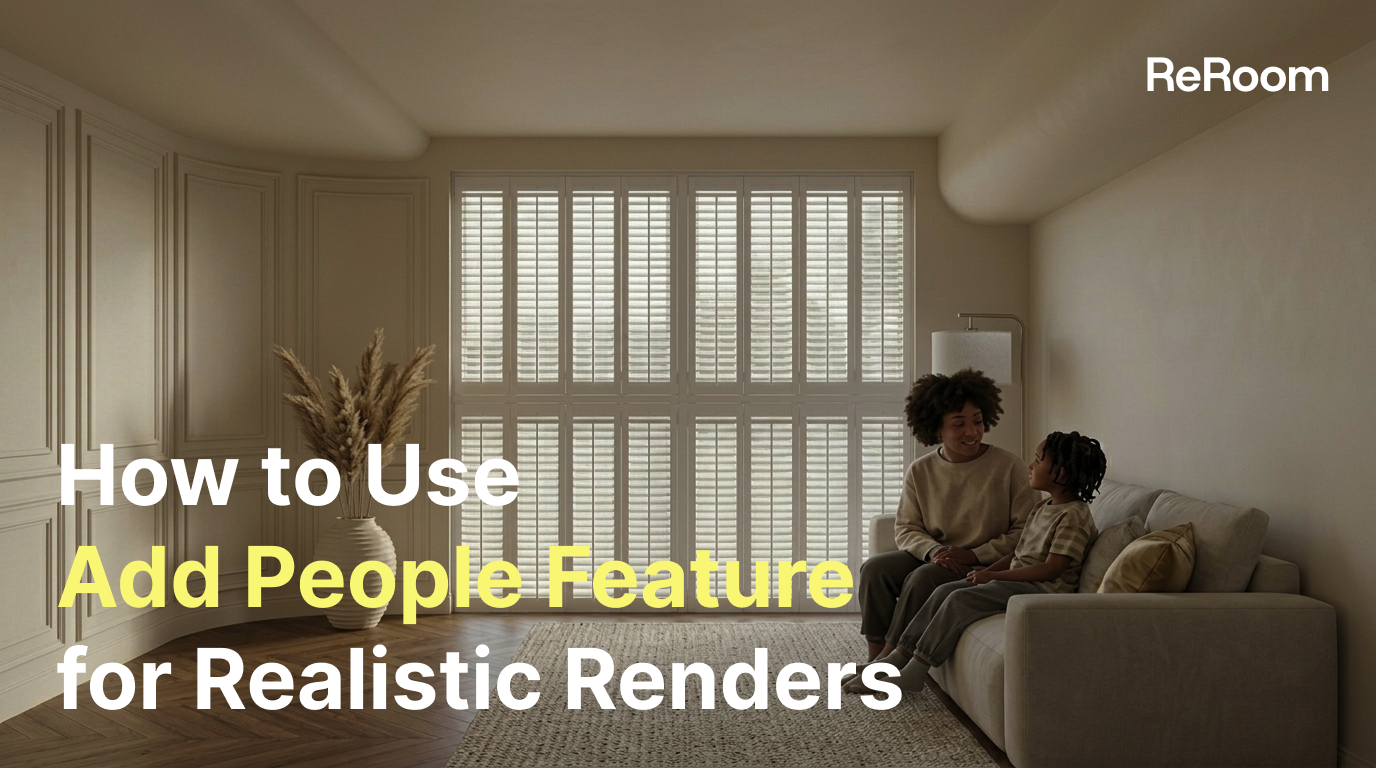
How to Quickly Use the Add People Feature for Realistic Renders
Learn how to use ReRoom AI's Add People feature to quickly add realistic figures to your architectural and interior renderings.
Foreword
In architectural and interior design proposals, while space itself is important, "people" are often the key to creating a sense of scale, life, and storytelling in the design.
In the past, adding figures to a rendered image usually required compositing, adjusting proportions, lighting, masking, and color tones using Photoshop, a cumbersome and time-consuming process.
ReRoom AI Add People allows users to directly specify the location of characters in the rendered image, and set the character's role, actions, clothing, and style to quickly generate realistic characters that blend naturally into the scene.
This article will guide you step by step through how to use Add People, and share suitable application scenarios and operating techniques.
Who is this feature suitable for?
Add People is suitable for the following users:
- Architects
- Interior designers
- Landscape architects
- Space design studios
- 3D visualization designers
If your renderings look empty and lack a sense of scale, or if you want to make it easier for clients to imagine how the space would be used, Add People is a very useful tool.
What problems can Add People solve?
In traditional workflows, adding figures to rendered images typically creates several problems:
- The proportions of the figures are not easy to align with the spatial dimensions.
- The lighting, color temperature, and scene may be inconsistent.
- It takes time to find suitable character materials.
- Photoshop compositing and retouching takes time.
- Different character assets may have different visual styles.
The goal of Add People is to simplify these processes. Users simply need to select the location of people in the image and set the conditions for the people, and the system can generate people that match the scene and atmosphere, making the image closer to a ready-to-present or deliverable state.
Preparation before use
Before you start using Add People, it is recommended that you prepare the following:
1. A rendering of a building or interior
It could be:
- Residential interior space
- Commercial space
- Hotel lobby
- Office
- Retail space
- Public square
- Outdoor architectural scene
It is recommended to choose images with clear composition, well-defined perspective, and sufficient completeness in the expected position of the figure.
2. Decide on the role of the characters in the picture
Before generating the character, consider what message you want to convey after adding the character, for example:
- Showing spatial scale
- Presenting life scenarios
- Strengthening the human flow in commercial spaces
- Making living spaces warmer
- Making public spaces look more vibrant
- Helping customers understand the traffic flow and usage methods
3. Prepare the character design direction
You can think about it first:
- Number of characters
- Age group
- Gender
- Role
- Action
- Clothing style
- Color preferences
- Overall atmosphere
- Whether it needs to conform to a specific ethnic group or situation
Step 1: Upload your rendered image
First, go to the “Add People” feature page in ReRoom AI and upload the architectural or interior rendering where you want to add people.
It is recommended to upload high-quality images with complete scenes, as this will make it easier for the generated result to blend with the original space.
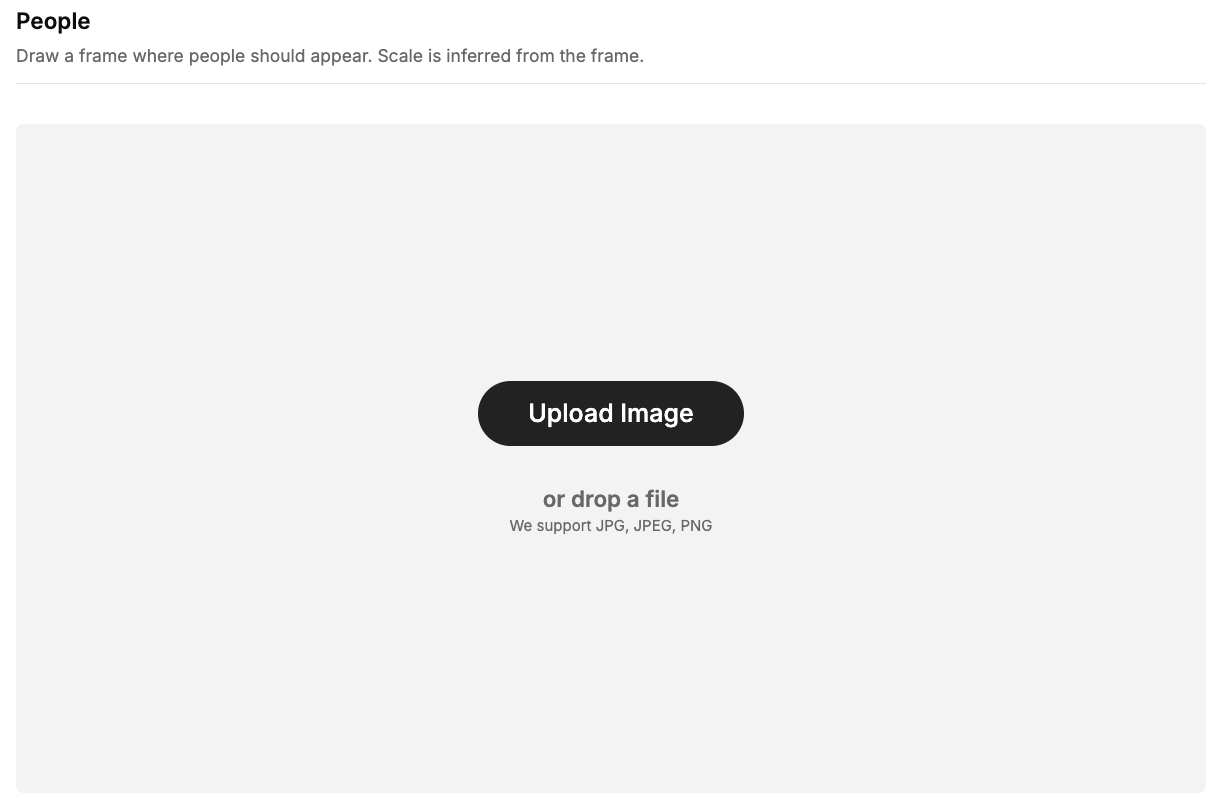
Figure 01. Upload the architectural or interior rendering where you want to add people
Step 2-1: Draw the position of the character on the screen
After uploading the image, select the area where you want the person to appear and draw a box in the image.
This frame will serve as the basis for AI to determine the position and proportion of the person.
You don't need to manually calculate the height of the character or the perspective ratio; the system will automatically estimate the size and proportion of the character based on the position of the frame and the scene.
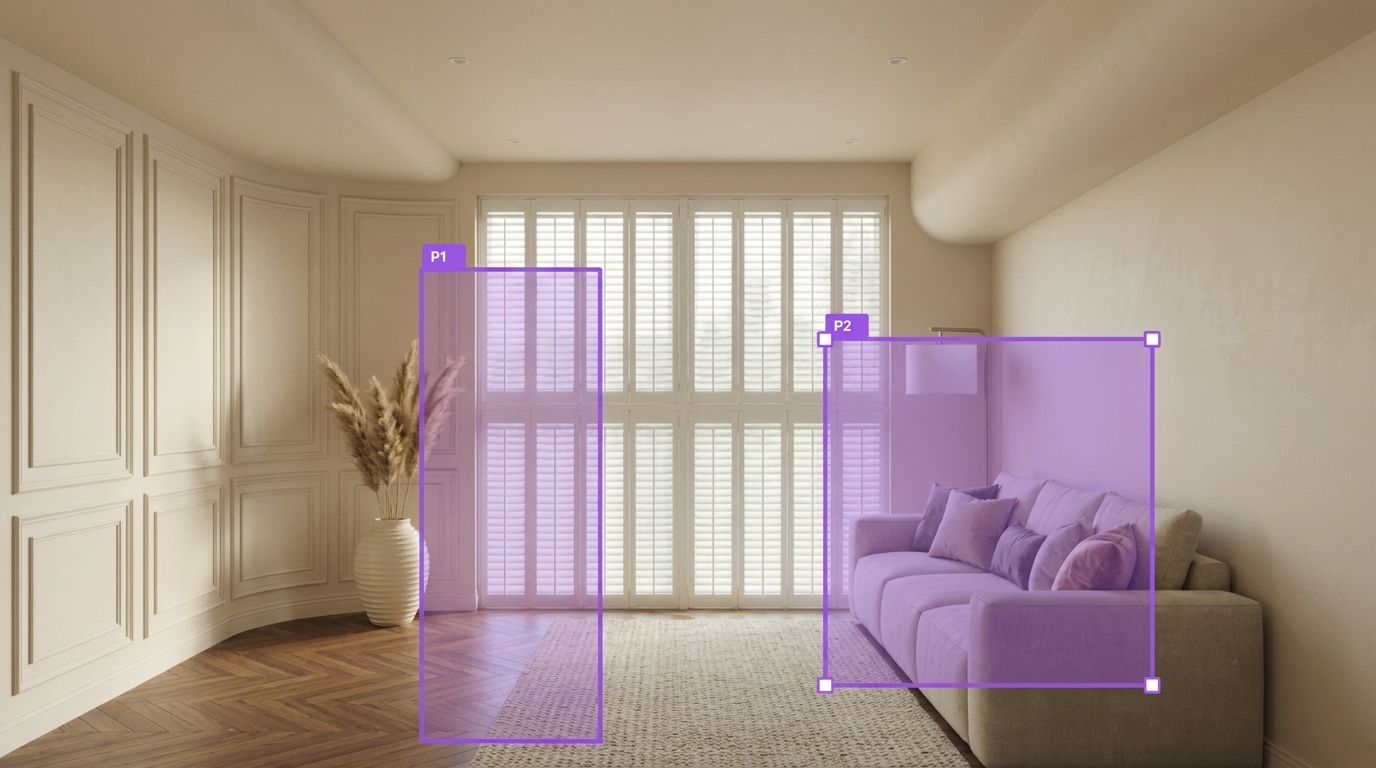 Figure 02. Draw a box to mark where the character should appear
Operational suggestions
When drawing a frame, please note:
- The selected area should conform to spatial perspective.
- Avoid figures obscuring important design details.
- The position of the character's feet should conform to the ground or path.
- If it is an indoor scene, the size of the characters must match the size of the furniture.
- For outdoor scenes, doors, windows, railings, or building heights can be used as a reference for proportion.
For example, in a residential living room, figures can be placed next to the sofa, at the dining table, or in the hallway. In commercial spaces, figures can be placed near entrances, counters, aisles, or display areas to give the images a more contextual feel.
Take the following living room space as an example, and imagine that a standing man and a woman sitting on a sofa are talking. For this case, you can use two box windows to tag the location to generate.
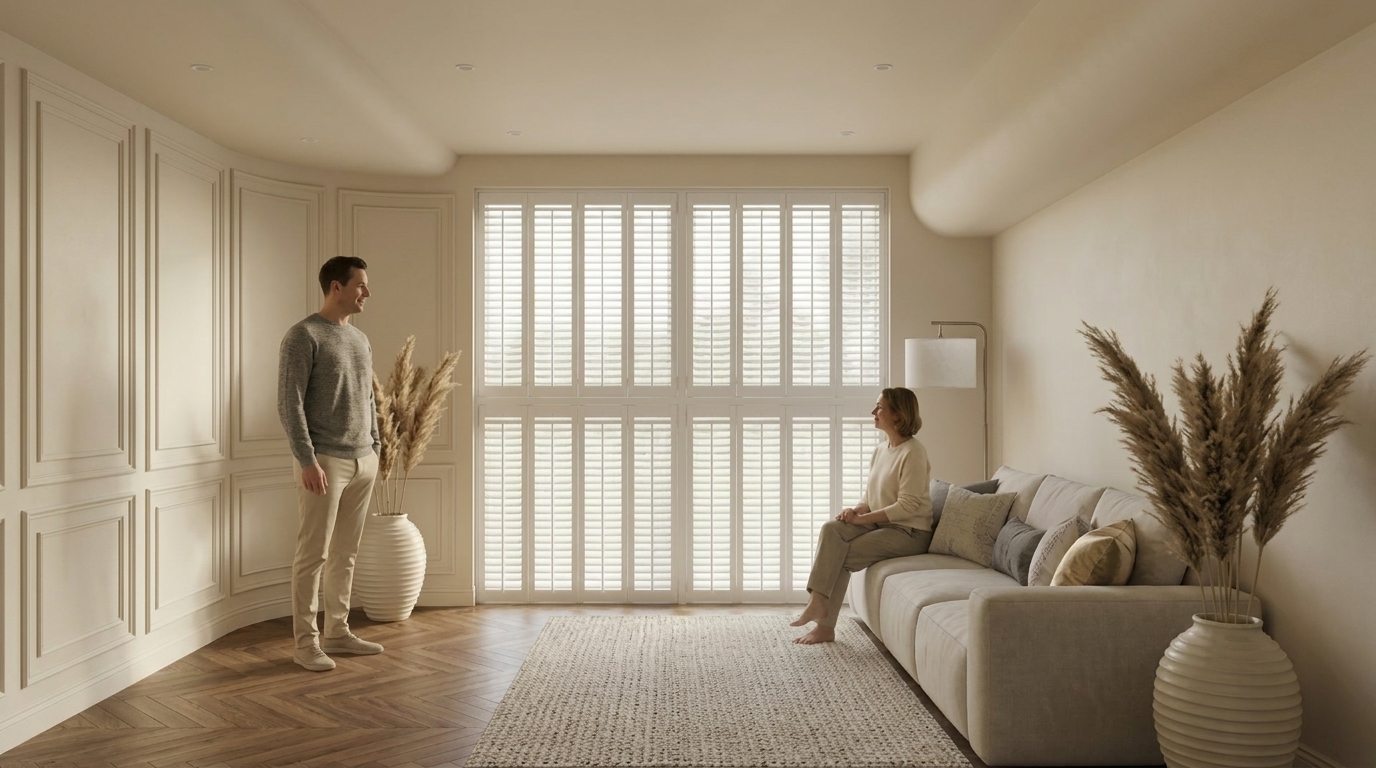
Figure 03. Use two boxes to mark the positions of two characters
Step 2-2: Adding Multiple Characters
If your scene requires a more complete or compact human element, you can also add multiple characters.
For example, two family members sitting on the sofa.
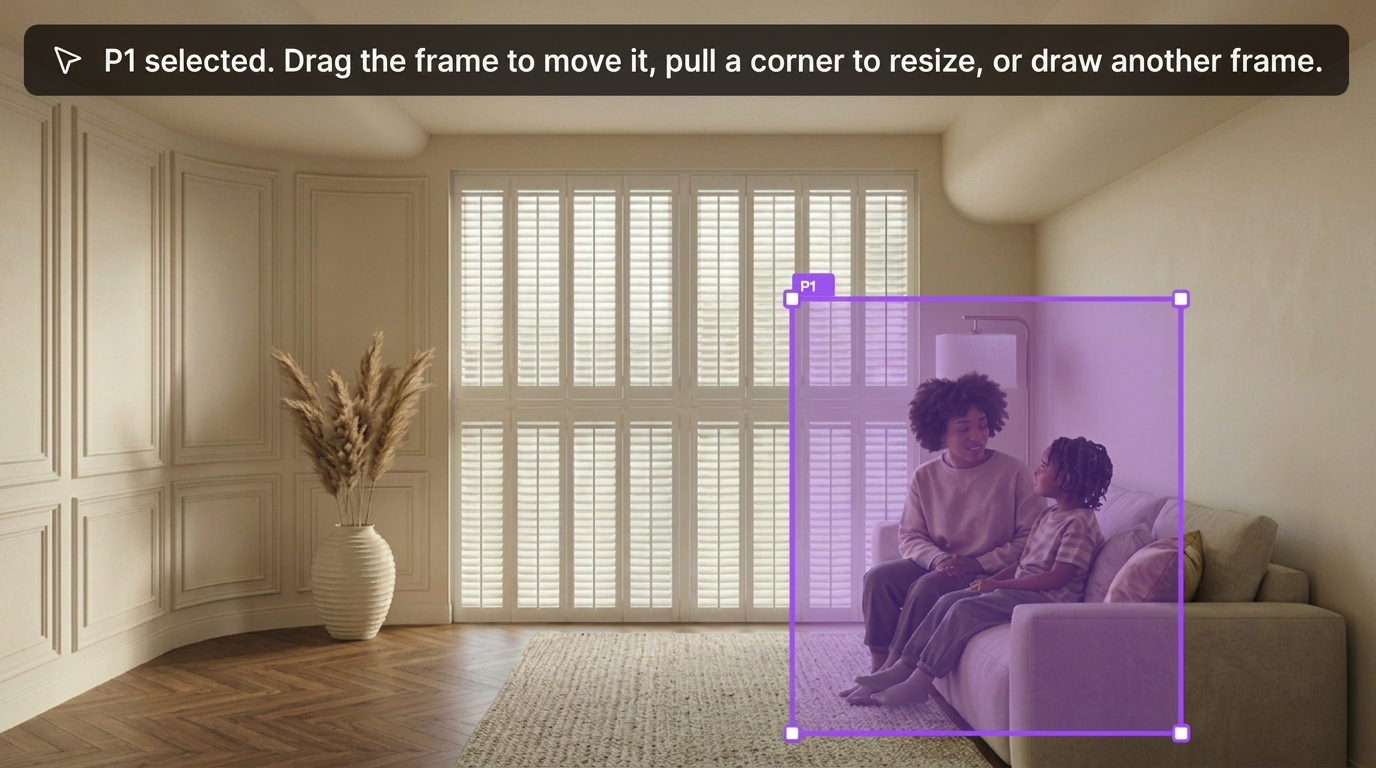
Figure 04. Add multiple characters in the same rendered image
Step 3: Set the character and actions
Next, specify the type of character you want the AI to generate.
You can choose the appropriate role based on the scenario, such as:
- Resident
- Hotel guest
- Office worker
- Student
- Pedestrian
- Customer
- Reception staff
You can also set character actions, such as:
- Walking
- Standing
- Talking
- Looking out the window
- Handling procedures at the counter
- Crossing the square
The following steps illustrate how to set up conversation actions.
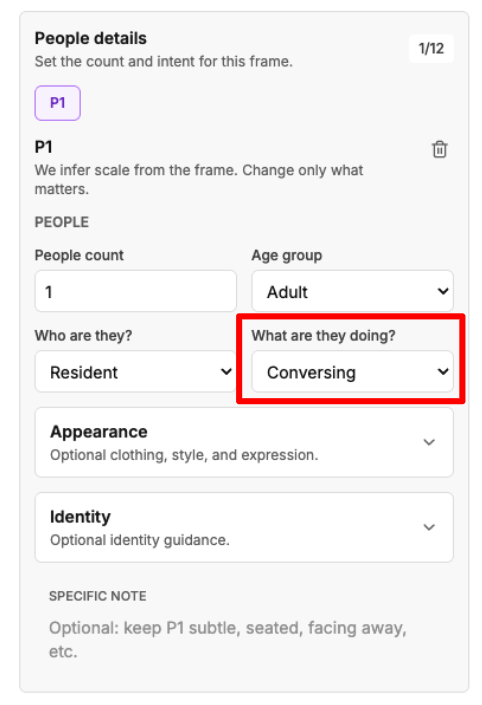
Figure 05. Set the character role and action
Suggested roles and actions for common space types
| Space Type | Suitable character roles | Suggested actions |
|---|---|---|
| Residential living room | Residents, visitors | Walking, sitting, talking |
| Hotel lobby | Passengers, reception staff | Waiting, checking in |
| Office | Employees, visitors | Walking, discussing, standing |
| Shop | Customers, shop assistants | Browsing products, checkout |
| Public square | Pedestrians, tourists | Walking, staying, interacting |
Step 4: Set clothing, colors, and style
Add People doesn't just add a character; you can also adjust the character's appearance to suit the atmosphere of the space.
You can set:
- Character rendering style
- Clothing style
- Color scheme
- Overall mood
- Age group
- Gender
- Ethnicity
- Other appearance conditions
The following steps demonstrate how to set appearance style, character attributes, and other conditions.
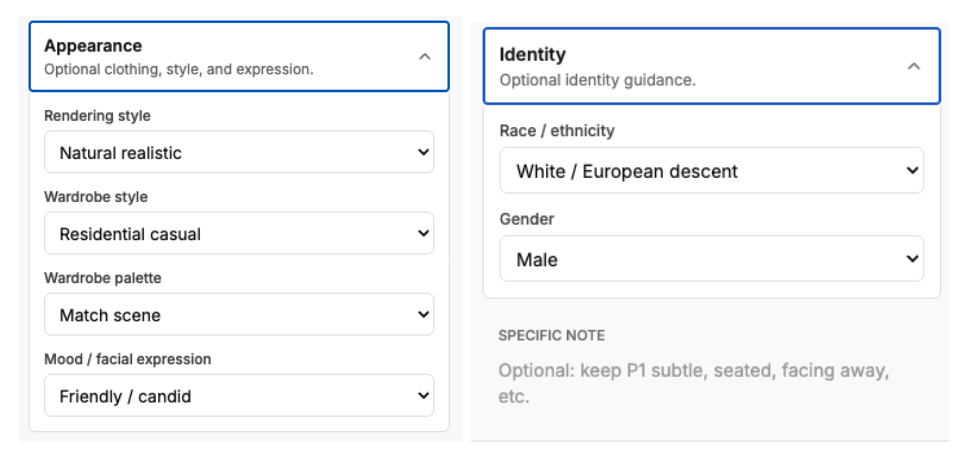
Figure 06. Set the character's clothing, colors, and style
Common clothing styles and scene matching combinations
- High-end residences: simple, natural, relaxing yet refined
- Office attire: business casual, formal shirts, suit jackets
- Hotel lobby: tourism and leisure, luggage, vacation feeling
- Fitness space: workout clothes, comfortable shoes
- Commercial district: urban leisure, street style
- Exhibition space: minimalist black, white, and gray color scheme; understated clothing
Color suggestions
The colors of the characters' clothing should ideally not overpower the main subject of the space.
If the rendered image itself has a warm color tone, you can choose clothing colors such as beige, brown, white, or warm gray.
If the space is modern and cool-toned, you can choose black, gray, dark blue, or low-saturation colors.
Step 5: Generate an image and check the results
After completing the settings, click "Generate".
The AI will add characters that fit the scene and perspective in the rendered image based on the location you select and the character settings.
After generation, it is recommended to check the following:
- Are the proportions of the human figures natural?
- Are the feet in contact with the ground?
- Is the perspective angle correct?
- Are the directions of light and shadow consistent?
- Does the clothing style match the atmosphere of the space?
- Does the human figure obscure important design considerations?
- Does the visual style convey a stronger sense of story and relatable usage scenarios?
If the result is not ideal, you can adjust the selection position, character description, or clothing settings and then regenerate.
Practical Tips: How to check whether character perspective is reasonable
In the scene, based on perspective principles, vanishing points, perspective lines, and horizon lines are used to help check whether the generated image is reasonable.
The horizon line is usually the horizontal height calculated from the spatial plane where the camera or observer is located. Taking the image below as an example, the observation height is approximately 130 cm. The relationship between the generated character and the horizon line can be quickly checked to see if it is reasonable.
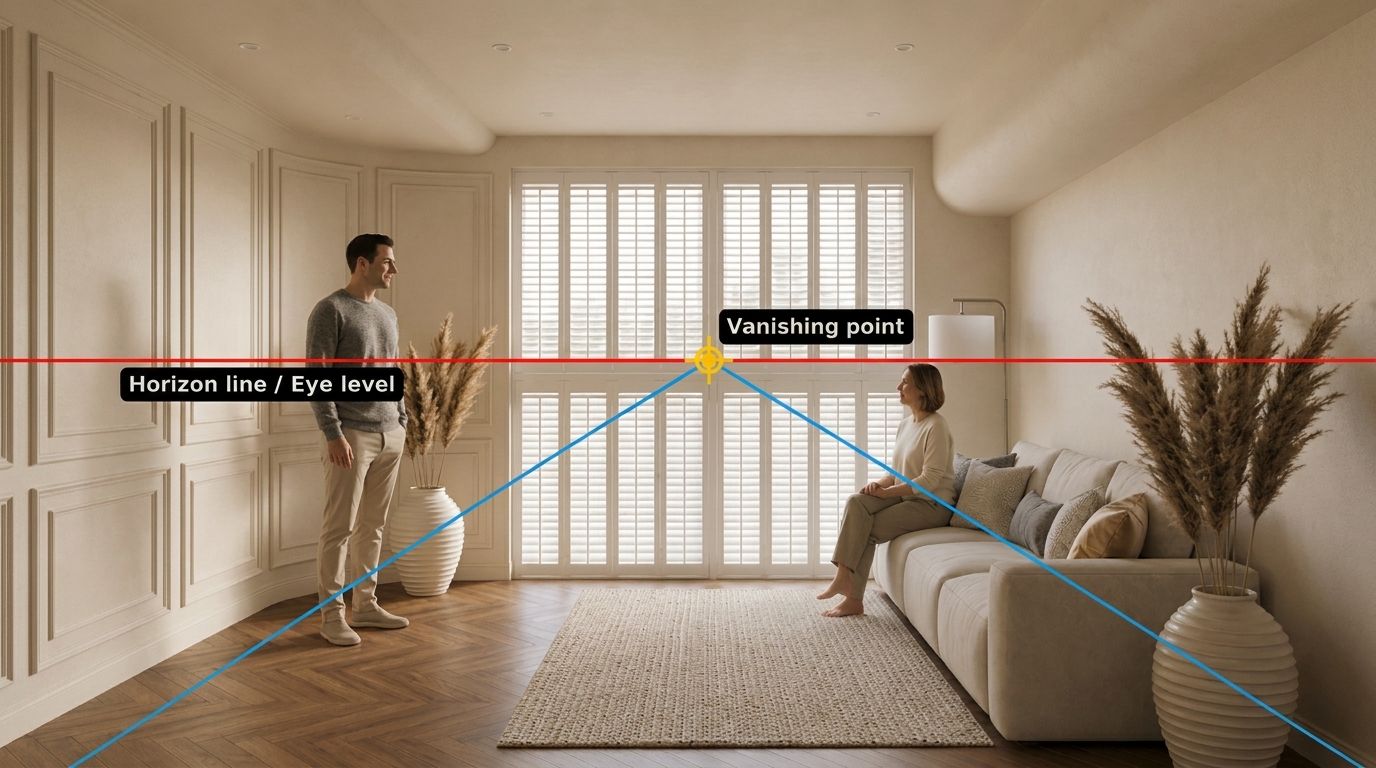
Figure 07. Use the horizon line to check whether character scale is reasonable
Additionally, AI can generate reasonable character angles and image sizes based on the perspective level of the scene. Here is a perspective experiment to demonstrate:
Mid-Horizontal Line
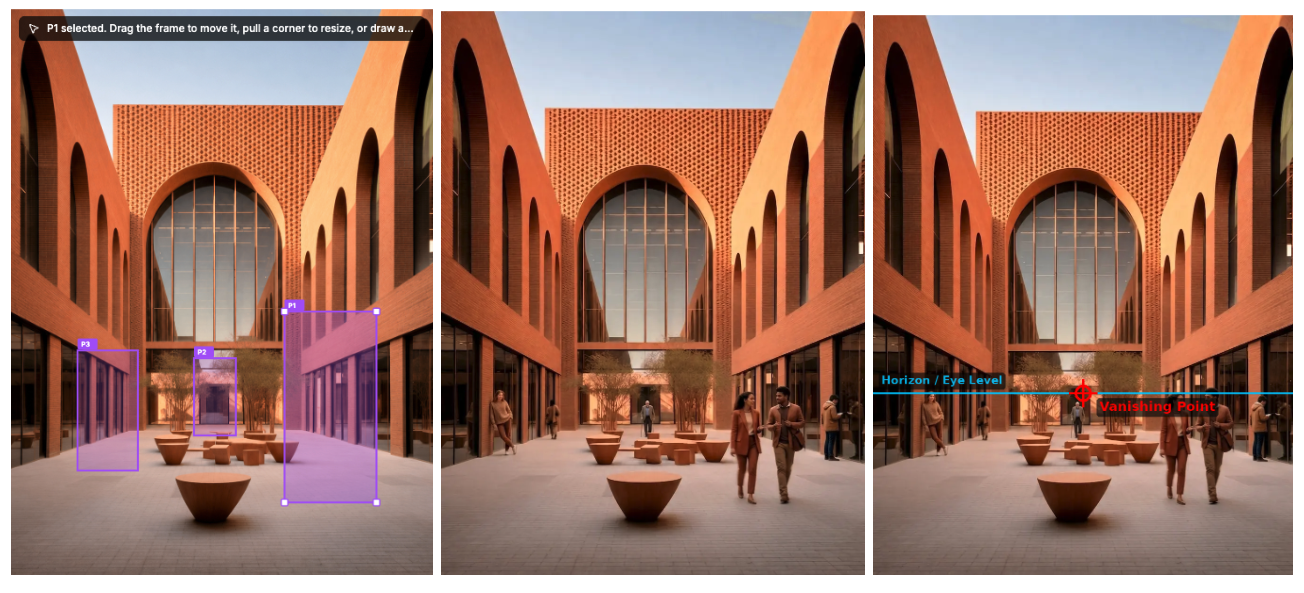
Figure 08. With a mid-horizontal line, the heads of people are positioned near the horizon line
The heads of the people in the image above are all positioned near the horizontal line, which conforms to the principles of perspective drawing.
High-Horizontal Line
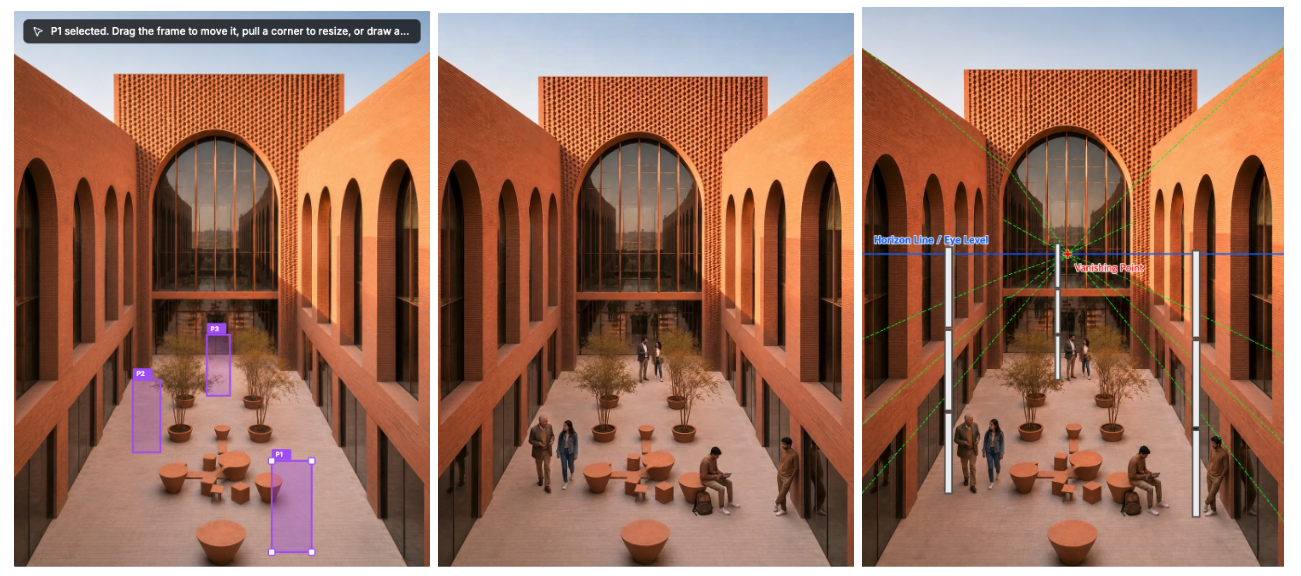
Figure 9. With a high-horizontal line, the foreground and background figures still follow perspective principles
The horizon line in the image above is approximately three times the height of a person, and the people in the foreground and background confirm that this conforms to the principles of perspective drawing.
Low-Horizontal Line

Figure 10. With a low-horizontal line, the horizon line is close to the ground
The horizon line in the image above is close to the ground, approximately between the people's legs and waist, which conforms to the principles of perspective drawing.
Common application scenarios
1. Residential Space Proposal
Adding people to the living room, dining room, or open kitchen can make the scene more lifelike and help clients imagine the actual living situation.
2. Commercial space display
Incorporating customers into retail, dining, or exhibition spaces can make the design appear more operational and enhance the flow of people and the sense of interaction within the space.
3. Hotel and reception spaces
Adding travelers or reception staff to the lobby, corridors, and rest areas can make the scene more service-oriented and contextual.
4. Office and Education Spaces
Adding users to office, meeting room, shared space, or campus settings can make the function of the space clearer.
5. Outdoor architecture and public spaces
Incorporating pedestrians into building facades, streets, plazas, or landscape spaces can enhance the sense of scale and make the design easier to understand.
Practical Tips: How to make characters blend more naturally into the scene
Tip 1: First, decide on the character's "role"
Don't just add someone; first figure out why that person is there.
For example, "Hotel guests are checking in" is more specific than "A person is standing in the lobby".
Tip 2: Make movements conform to spatial functions
Character actions should respond to the purpose of the space.
People in the office can discuss or walk around; people in the store can browse the merchandise; people in the home can relax, move around, or interact with their family.
Tip 3: Clothing should not clash with the space
Clothing should serve the visual purpose of the image, not become a visual distraction.
If the main element of the space is architectural design, human figures should blend in naturally and should not be overly bright or eye-catching.
Tip 4: The character's position should conform to the movement flows
Placing human figures in entrances, aisles, counters, seating areas, or open spaces usually feels more natural than placing them in corners or on the edges of furniture.
Tip 5: Use figures to establish a sense of scale
In architectural exteriors, public spaces, or high-ceilinged interior scenes, human figures can help viewers understand the height, width, and distance of a space.
Frequently Asked Questions
Q1: What types of spaces is “Add People” suitable for?
Suitable for all types of architectural and interior renderings, including residential, commercial, hotel, office, retail, public spaces, and outdoor architectural scenes.
Q2: Can I add multiple characters at once?
Yes. You can draw multiple character frames on the same image and assign different roles, outfits, actions, and identities to each character.
Q3: Do I need to use Photoshop?
No. The point of “Add People” is to allow users to quickly add people to rendered images without needing additional compositing software.
Q4: Can the generated results be used directly in the proposal?
If the proportions of the figures, lighting, and style meet the visual requirements, the generated image can be used as a proposal, presentation, or design showcase. It is still recommended to check the details before final delivery, and regenerate or fine-tune the settings if necessary.
Q5: How to avoid making the characters look out of place?
It can be adjusted in three directions:
- Select roles that fit the purpose of the space.
- Ensure that the color of the clothing matches the color scheme of the scene.
- Place the characters in a reasonable movement flow or area.
Related posts
How to Turn Static Renders into AI Walkthrough Videos
A static render can become more than a single image. With the right video prompt, it can turn into an immersive spatial walkthrough.
Willy·Jul 21, 2026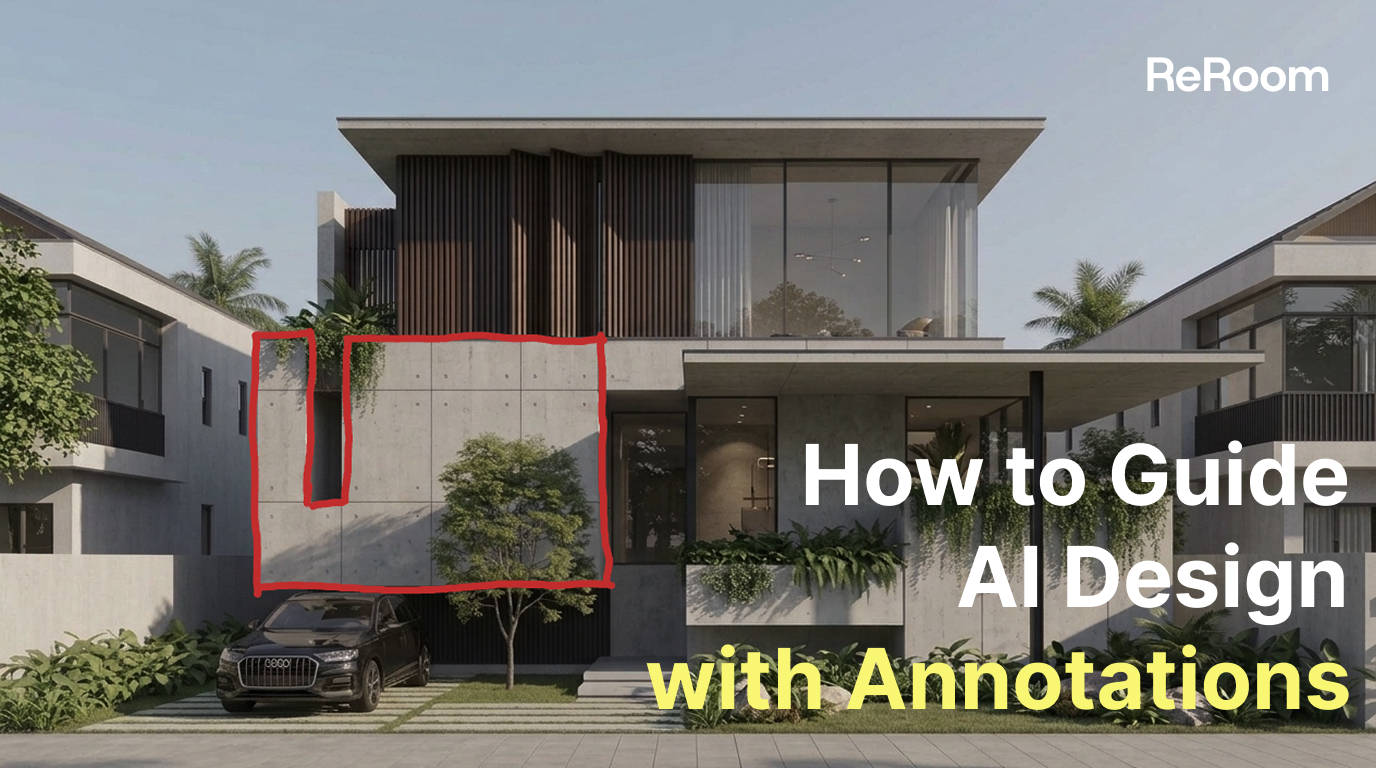
How to Guide AI Design with Annotations
Sometimes drawing directly on the image is more accurate than writing a longer prompt.
Willy·Jul 16, 2026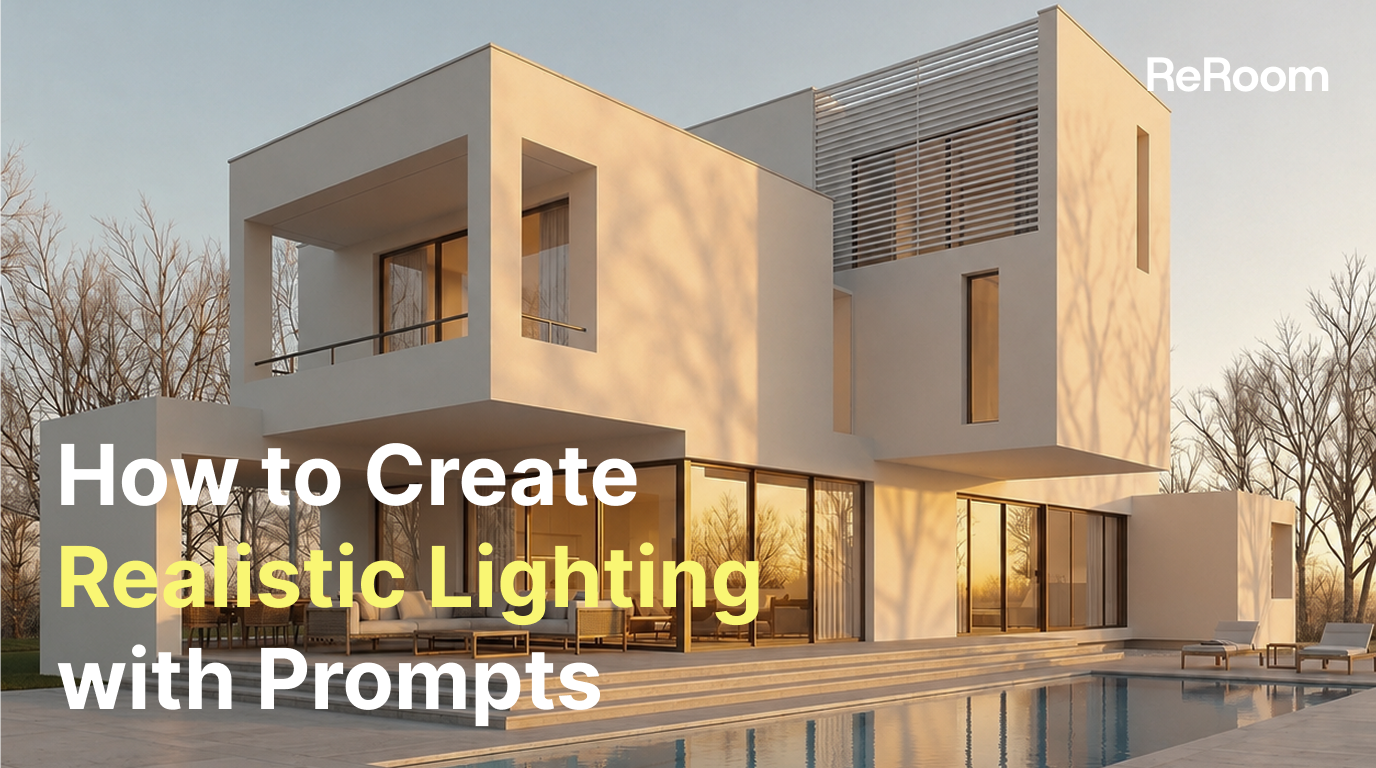
How to Create Realistic Lighting with Prompts
The same minimal scene can feel completely different when you change the lighting prompt.
Willy·Jul 9, 2026